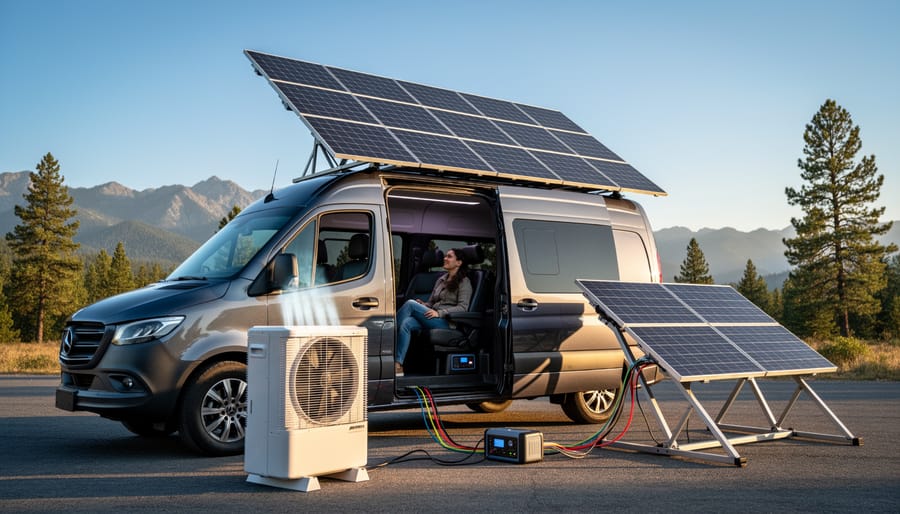
Calculate your air conditioner’s power draw first—most RV units require 1,500-3,500 watts to start and 1,000-2,000 watts to run continuously. Multiply your running watts by the hours you’ll use AC daily, then add 20% for system inefficiencies to determine your true solar needs. A typical 15,000 BTU unit running 8 hours needs roughly 10,000-12,000 watt-hours of energy storage.
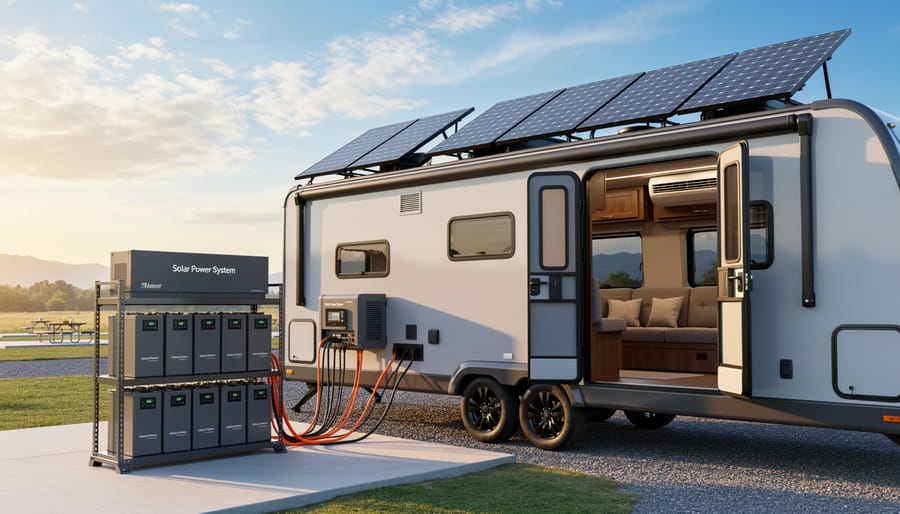
Invest in lithium batteries over lead-acid for AC applications. You’ll need substantial capacity—typically 600-1,200 amp-hours at 12V (or 300-600Ah at 24V)—because air conditioning drains power faster than any other RV appliance. Lithium batteries charge faster, discharge deeper without damage, and handle the high current demands AC units create.
Plan for 1,200-2,400 watts of solar panels minimum, though 2,000+ watts gives realistic all-day AC capability in sunny conditions. Your solar array only generates peak power for 4-6 hours daily, so oversizing panels compensates for morning, evening, and cloudy periods when your AC still needs to run.
Budget $4,000-$8,000 for a capable system including panels, batteries, inverter, and installation. This investment transforms family camping trips and RVing with pets by enabling comfortable temperatures anywhere, eliminating generator noise and campground electrical hookup dependency.
Running RV air conditioning on solar is absolutely achievable, but requires honest assessment of your cooling needs, significant upfront investment, and proper system sizing. The following guide breaks down exactly what you need to make solar-powered AC a reality in your RV.
Why Running RV AC on Solar Is So Challenging (But Possible)
Let’s be honest: running your RV air conditioner on solar power is one of the toughest challenges you’ll face in the off-grid world. But before you give up on the idea, understanding exactly why it’s difficult will help you make an informed decision about whether it’s achievable for your situation.
The main culprit? Raw power demand. A typical 13,500 BTU RV air conditioner draws between 1,200 and 1,500 watts while running steadily. Step up to a 15,000 BTU unit, and you’re looking at 1,500 to 1,800 watts of continuous power. That’s already substantial, but here’s where it gets trickier: startup surge.
When your AC compressor kicks on, it temporarily demands 2 to 3 times its running wattage. That 13,500 BTU unit that runs on 1,400 watts? It might spike to 2,800-4,200 watts for just a few seconds during startup. Your solar system needs to handle both these numbers comfortably.
To put this in perspective, a single 400-watt solar panel produces its rated output only under ideal conditions at peak sun. You’d need multiple panels working together, substantial battery storage to provide that surge power, and a robust inverter capable of handling the startup demands without shutting down.
Here’s the reality check: solar panels don’t generate power at night, and they produce significantly less during cloudy weather or early morning and late afternoon hours. This means you’re relying heavily on battery storage, which needs to be large enough to run your AC when the sun isn’t shining and recharge during daylight hours.
Can it be done? Absolutely. Many RVers successfully run their air conditioners on solar, but it requires careful planning, appropriate equipment sizing, and realistic expectations. You might not run your AC 24/7 in extreme heat, but with the right system, you can certainly enjoy comfortable temperatures during peak sun hours and strategic cooling throughout the day.
The Three Essential Components of an RV Solar AC System
Solar Panels: How Much Wattage You Really Need
When it comes to powering your RV air conditioner with solar, understanding your wattage needs is absolutely essential. Let’s break down the numbers so you can make an informed decision.
For occasional AC use during the hottest parts of the day, you’ll need a minimum of 800-1200 watts of solar panels. This setup works if you’re only running your air conditioner for a few hours and have sunny conditions. However, don’t expect to keep cool all day long with this configuration. You’ll need to be strategic about when you use your AC and rely on battery storage for brief cooling sessions.
If you want reliable daily air conditioning, especially during extended hot weather, plan for 1600 watts or more. Many full-time RVers who regularly use their AC systems install 2000-3000 watts to ensure they have enough power even on partly cloudy days. Remember, solar panels don’t always produce their rated wattage due to angle, temperature, and weather conditions, so having extra capacity provides a valuable buffer.
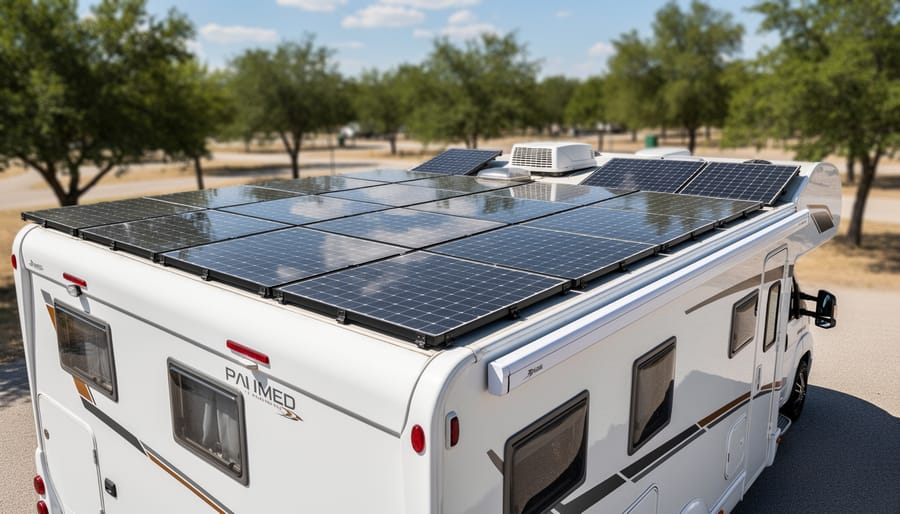
Roof space is often the limiting factor. A typical 300-watt panel measures about 5.5 feet by 3.5 feet, so four panels would take up roughly 77 square feet. Before committing to a system size, carefully measure your available roof space, accounting for vents, satellite dishes, and other obstacles.
You’ll encounter three main panel types. Monocrystalline panels offer the highest efficiency and best performance in limited space, though they cost more upfront. Polycrystalline panels are more budget-friendly but slightly less efficient. Flexible panels work well for curved roofs but typically don’t last as long as rigid options.
Here’s a practical tip: start by calculating your AC’s actual power consumption over several hours, then add 25-30 percent to account for system losses. This approach ensures you won’t fall short when you need cooling most.
Battery Bank: Your Power Storage Solution
If your solar panels are the heart of your system and your inverter is the brain, then your battery bank is definitely the muscle that makes everything happen. Running an RV air conditioner on solar isn’t just about collecting energy—it’s about storing enough power to keep cool when you need it most.
Here’s the reality: air conditioners are power-hungry beasts. A typical 15,000 BTU RV air conditioner draws around 150 amps per hour from your battery bank. That means if you want to run your AC for just 3-4 hours during the hottest part of the day, you’re looking at 450-600 amp-hours of power consumption. Add in your other electrical needs, and you’ll quickly understand why massive battery capacity isn’t optional—it’s essential.
When it comes to battery technology, you have two main options: traditional lead-acid batteries or modern lithium batteries. While lead-acid batteries have a lower upfront cost, they’re the budget option that ends up costing more in the long run. You can only safely discharge them to about 50% capacity, meaning a 400Ah lead-acid bank really only gives you 200Ah of usable power. They’re also heavier, require regular maintenance, and typically last only 3-5 years.
Lithium batteries, specifically lithium iron phosphate (LiFePO4), are the game-changer for serious solar setups. You can safely use 80-90% of their capacity, they weigh about half as much, require zero maintenance, and last 10-15 years. For running an air conditioner, you’ll want a minimum of 400-600Ah of lithium capacity, though many full-timers opt for 600-800Ah to provide comfortable cushion and extend battery life.
Let’s talk dollars and sense. A quality 400Ah lithium battery bank will run you $3,000-$5,000, while an 800Ah setup might cost $6,000-$9,000. Yes, that’s a significant investment. But when you calculate the cost per year over a lithium battery’s lifespan and factor in the freedom to camp off-grid comfortably, many RVers find it worthwhile.
The bottom line? Don’t skimp on battery capacity if you’re serious about solar-powered air conditioning. It’s better to oversize your battery bank now than to add capacity later, which typically costs more in the long run.
Inverter: Converting Solar Power to AC Power
Think of the inverter as the translator between your solar panels and your air conditioner. Your panels produce DC (direct current) power, but your AC unit speaks only AC (alternating current). That’s where a quality inverter becomes absolutely essential.
For running an RV air conditioner, you’ll need a pure sine wave inverter rated at 3000W minimum. Don’t skimp here by choosing a modified sine wave inverter, even if it’s cheaper. Air conditioners have sensitive compressor motors that require clean, smooth power to run efficiently and safely. A modified sine wave can cause your AC to run hotter, make buzzing noises, or even fail prematurely.
Here’s something many first-timers overlook: surge capacity. When your air conditioner first kicks on, it draws substantially more power than during normal operation, sometimes 2-3 times the running wattage. This startup surge only lasts a few seconds, but your inverter must handle it. A 3000W continuous inverter typically offers 6000W surge capacity, which gives you that necessary cushion for startup.
Quality inverters also include built-in protections that matter for expensive appliances like air conditioners. Look for models with over-temperature shutdown, low-voltage cutoff, and overload protection. These features prevent damage to both your inverter and your AC unit when conditions aren’t ideal.
Expect to invest between 500-1200 dollars for a reliable unit from reputable brands. This might seem steep, but remember, this component handles all your AC power conversion. A failed inverter means no air conditioning, regardless of how much solar power you’re generating. It’s one component where choosing quality over price truly pays off in reliability and longevity.
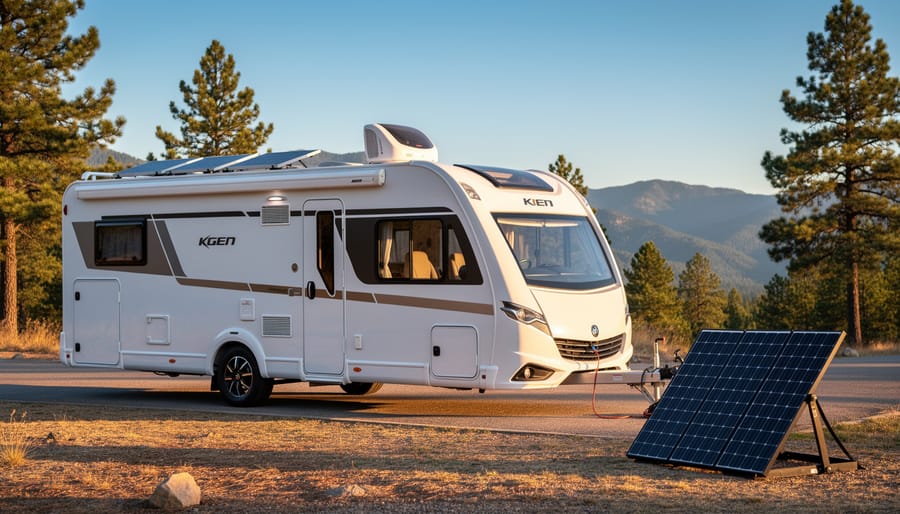
Calculating Your Solar System Size: A Practical Example
Let’s walk through a practical example that shows exactly how to calculate the solar system size you’ll need for your RV air conditioning setup.
Meet Sarah, who owns a 30-foot travel trailer with a 13,500 BTU rooftop air conditioner. She plans to camp in Arizona during spring and fall, running her AC primarily during the hottest afternoon hours. Here’s how she determines her system requirements.
First, Sarah checks her AC unit’s specifications and finds it draws 11 amps at 120V when running, which equals 1,320 watts. However, the startup surge requires about 3,000 watts briefly. She estimates running the AC for 6 hours daily during peak heat.
Here’s the simple formula Sarah uses:
Daily energy requirement = (AC wattage × hours of use) × 1.3
The 1.3 multiplier accounts for system inefficiencies and inverter losses. For Sarah’s situation: (1,320 watts × 6 hours) × 1.3 = 10,296 watt-hours, or roughly 10.3 kilowatt-hours per day.
Next, she calculates her battery bank needs. Since lithium batteries should only discharge to 20% for longevity, and she wants one day of autonomy, she needs: 10,300 watt-hours ÷ 0.8 (usable capacity) = 12,875 watt-hours. At 12 volts, that’s about 1,073 amp-hours, which she rounds up to 1,200Ah of lithium battery capacity.
For solar panels, Sarah considers her camping location receives an average of 5.5 peak sun hours daily during her travel season. To replenish her battery bank: 10,300 watt-hours ÷ 5.5 hours = 1,873 watts of solar panels. She rounds up to 2,000 watts to account for cloudy days and panel angle limitations.
Finally, Sarah needs a 3,000-watt pure sine wave inverter to handle the startup surge.
Your calculation will differ based on your AC size, usage hours, and location. In cloudy climates, add 20-30 percent more solar capacity. If you plan to run your AC for longer periods, proportionally increase both batteries and panels. This formula gives you a realistic starting point for designing a system that matches your specific camping lifestyle.
Cost Breakdown: What to Expect When Going Solar for AC
Let’s talk numbers, because understanding the investment is crucial for making an informed decision about your RV solar setup. A complete solar system capable of running your air conditioner typically ranges from $5,000 to $15,000 or more, depending on your specific needs and choices.
Breaking down the costs, here’s what you can expect: Solar panels will run you approximately $1,000 to $2,500 for the 800-1,200 watts you’ll likely need. Lithium batteries represent the biggest investment at $2,000 to $8,000, depending on capacity (remember, you’ll need at least 400-600 amp-hours for AC use). A quality inverter capable of handling air conditioner startup surges costs between $800 and $2,000. Don’t forget the charge controller at $300 to $800, plus mounting hardware, wiring, and connectors adding another $500 to $1,000.
The DIY versus professional installation decision significantly impacts your bottom line. Installing the system yourself can save $2,000 to $5,000 in labor costs, making it attractive for handy RV owners. However, professional installation ensures everything is done correctly and safely, often includes warranties, and saves you considerable time and stress. Many RVers find a middle ground by purchasing their own components and hiring professionals for the electrical connections.
When exploring budget-friendly solar AC solutions, consider that going solar is an investment that pays dividends over time. Calculate your typical campground costs with hookups, usually $40-60 per night, versus boondocking for free with solar. If you camp 30 nights yearly, you could recoup costs in 3-5 years while gaining the freedom to camp anywhere. Plus, you’re adding resale value to your RV and reducing your environmental footprint. Think of it as buying freedom and flexibility rather than just equipment.
Smart Strategies to Make Solar AC More Achievable
Choosing a More Efficient Air Conditioner
Before investing in massive solar arrays and battery banks, consider that upgrading to a more efficient air conditioner can dramatically reduce your power requirements and overall costs.
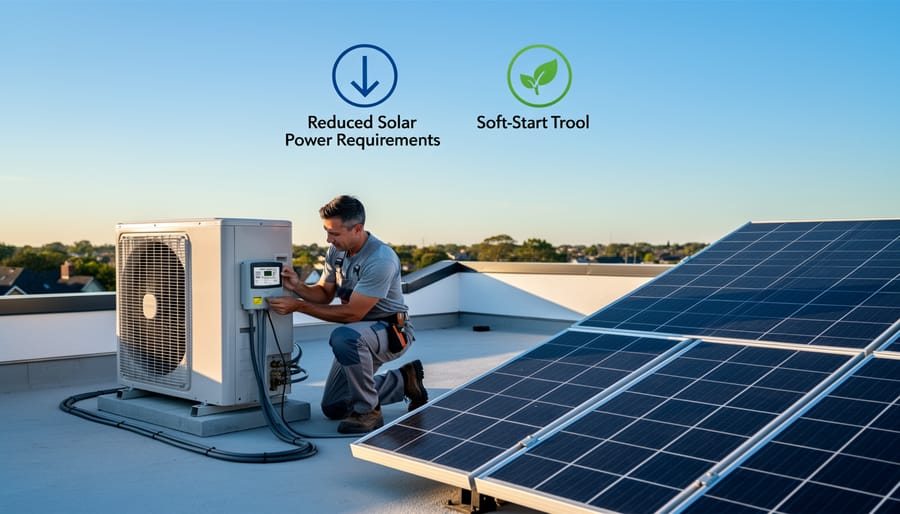
Modern mini-split AC units are game-changers for solar-powered RVs. These systems typically draw 50-70% less power than traditional rooftop units, often consuming just 400-600 watts during operation compared to 1,500-2,000 watts for conventional models. While mini-splits require professional installation and cost between $600-1,200, the energy savings make them worthwhile for serious boondockers. Popular models like the Della and Pioneer units are specifically designed for off-grid applications.
If you’re committed to keeping your existing AC unit, installing a soft-start kit can make a significant difference. These devices, which cost around $200-300, reduce the initial power surge when your compressor kicks on. This means you can run your AC with a smaller inverter and fewer batteries, potentially saving thousands on your solar setup. Installation is straightforward enough for handy RV owners, though hiring a technician ensures proper setup.
Look for units with high Energy Efficiency Ratio ratings when shopping for new air conditioners. EER ratings of 11 or higher indicate excellent efficiency. Some manufacturers now produce 12-volt DC air conditioners specifically for RVs, eliminating inverter losses entirely. While these units cost more upfront, they maximize your solar investment by using power more effectively. Remember, every watt you save on cooling is one less watt you need to generate and store.
Reducing Your Cooling Load
Before investing thousands in solar panels and batteries, it’s worth reducing how hard your air conditioner needs to work. Think of it this way: every degree you can keep your RV cooler naturally means less power draw from your system.
Start with your windows. Reflective window covers or insulated shades can block up to 80% of heat gain from direct sunlight. Focus especially on windshields and windows facing the afternoon sun. During the hottest part of the day, these simple additions can reduce interior temperatures by 10-15 degrees.
Parking strategy matters more than you might think. Position your RV so the side with the most windows faces away from the afternoon sun. Even better, find natural shade under trees whenever possible. If you’re boondocking, consider the sun’s path throughout the day when choosing your spot.
Improving your RV’s insulation pays dividends year-round. Check for air leaks around windows, doors, and roof vents. Weather stripping is inexpensive and easy to install. Some RVers also add reflective insulation to their roof or install vent covers that allow airflow while blocking sun.
Don’t underestimate ventilation. Running roof vents with fans during cooler morning and evening hours can purge hot air and reduce your AC runtime significantly. Many experienced full-timers report cutting their air conditioning usage by 30-50% just by combining these passive cooling strategies.
The bottom line: reducing your cooling load means you’ll need fewer solar panels, smaller batteries, and you’ll enjoy longer periods of comfortable off-grid camping.
Hybrid Cooling Solutions
Here’s the reality: running your AC entirely on solar isn’t always practical, but a hybrid approach gives you the best of all worlds. By combining solar power with other energy sources, you’ll stay comfortable without breaking the bank or hauling massive battery banks.
The most common hybrid setup pairs solar panels with shore power at campgrounds. Your solar system handles daytime loads and keeps batteries topped off, while you plug in for AC use during hot afternoons or overnight. This drastically reduces your reliance on hookups while maintaining comfort when you need it most.
Generator backup is another smart option. Modern inverter generators are quieter and more fuel-efficient than older models. Use solar for most of your power needs, then fire up the generator during peak cooling hours. This combination lets you boondock longer while using a smaller, more affordable solar array.
Don’t overlook alternative cooling methods either. Roof vent fans create excellent cross-ventilation and draw surprisingly little power from your solar setup. Evaporative coolers work beautifully in dry climates, using a fraction of the electricity traditional AC units demand. By strategically combining these cooling methods with your solar system, you’ll maximize comfort while keeping your power requirements—and costs—manageable.
Common Mistakes to Avoid When Building Your Solar AC System
Even experienced RVers make critical mistakes when setting up solar AC systems that can lead to disappointing results or equipment damage. Let’s look at the most common pitfalls so you can avoid them.
The biggest mistake is undersizing your battery bank. Many folks calculate their needs based on running wattage alone, forgetting that batteries shouldn’t be discharged below 50% (for lead-acid) or that you’ll need multiple days of capacity. If your math says you need 400Ah, seriously consider 600Ah or more for real-world conditions.
Surge power is another frequently overlooked factor. Your air conditioner might run on 1,500 watts, but it needs 3,000-4,000 watts for those first few seconds when the compressor kicks on. Your inverter must handle these surges, or it’ll simply shut down every time your AC tries to start. This is where soft-start kits prove invaluable.
Wire gauge requirements catch many DIYers off guard. Using undersized wires between your battery bank and inverter creates dangerous heat buildup and voltage drops that reduce efficiency. At high amperage, even short cable runs need thick gauge wire—often 2/0 or larger. This connects directly to properly sizing fuses for your system’s safety.
Unrealistic expectations about cloudy-day performance lead to frustration. Solar panels produce dramatically less power under overcast skies—sometimes only 10-25% of their rated capacity. Plan to rely heavily on your battery reserves during cloudy weather, and consider supplementing with portable power stations or shore power when available.
Finally, don’t assume you can run your AC continuously 24/7 on solar alone. Most successful systems involve strategic cooling during peak sun hours while batteries recharge.
Running your RV air conditioner on solar power is absolutely possible, but it’s not a decision to take lightly. This is a significant investment that requires substantial equipment—we’re talking multiple high-wattage panels, a robust lithium battery bank, and a powerful inverter system. For full-time RVers who frequently boondock in hot climates, the investment can pay dividends in comfort and camping flexibility. Weekend warriors who mostly stay at campgrounds with hookups might find the cost harder to justify.
The key to success is starting with your specific power needs and camping style. Calculate your actual AC runtime, consider whether a soft start or mini-split makes sense for your situation, and be realistic about your budget. Remember, you can always start smaller and expand your system over time as your needs and budget allow.
If you’re primarily interested in running other appliances and just occasional AC use, a more modest system with careful power management might be your sweet spot. The beauty of solar is its flexibility—design the system that matches your actual camping lifestyle, not someone else’s dream setup.